4 min read
How to Integrate Swagger with a Laravel Project for API Documentation
Delivery Manager & Software Architect

With most of our projects, frontend and backend are separate applications communicating with each other via Rest APIs.
There might be hundreds of API endpoints in bigger projects. Therefore, verbal or unstructured written communication (over Slack, chat, email, etc.) about the API services between developers quickly devolves into chaos and becomes a massive drawback for the team. Eventually, it hits where it hurts the most - the development team starts spending precious hours clearing out which API endpoints are in the project and how they function. Needless to say, onboarding new developers with the project also becomes much more complicated.
That’s where API documentation comes into play. Documenting every API endpoint facilitates the effective exchange of information between product development team members.
API documentation fully describes how the services function:
- What is the API endpoint ( the URL that the request should be made to. e.g.,/users )
- Which HTTP methods do endpoints support? (GET, POST, PUT, PATCH, DELETE)
- What are the route parameters that the endpoint is expecting? (Query Params)
- What should be the request body of the endpoint?
- What kind of responses should we expect from the endpoint? And with what status code?
What is Swagger, how it works and how it can help you with API documentation
Swagger is one of the most popular tools for API documentation. It lets us document the API endpoints and provides an interface to send requests to each API service and receive responses. Additionally, you can configure Swagger to communicate with multiple backend environments like local, development, staging, production, etc. This is extremely important in the process of testing the API.
Swagger uses YAML for describing API endpoints. You can find the sample documentation here: https://editor.swagger.io/.
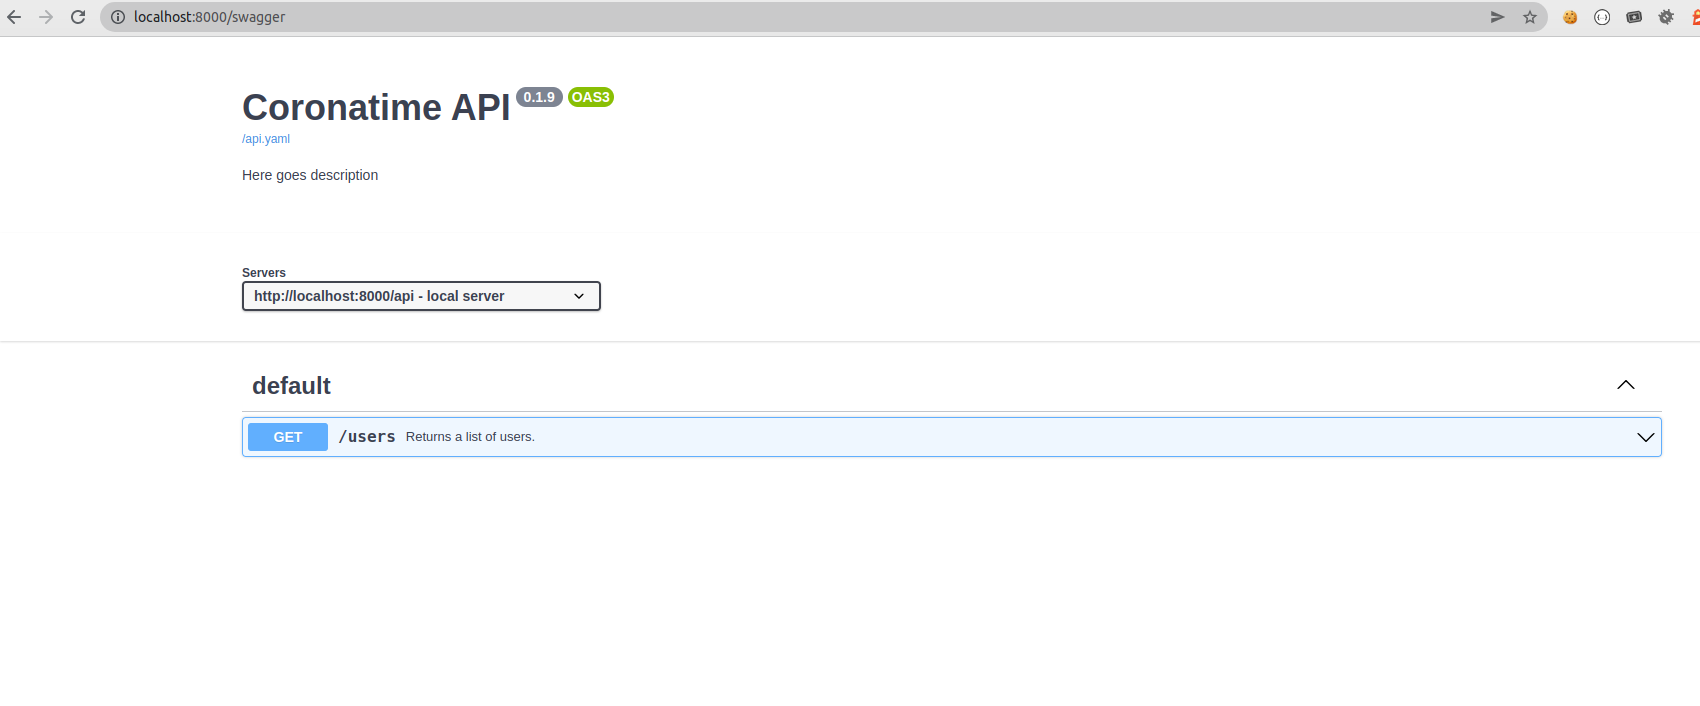
In the end, you get a fully documented API for your project, which looks something like this:
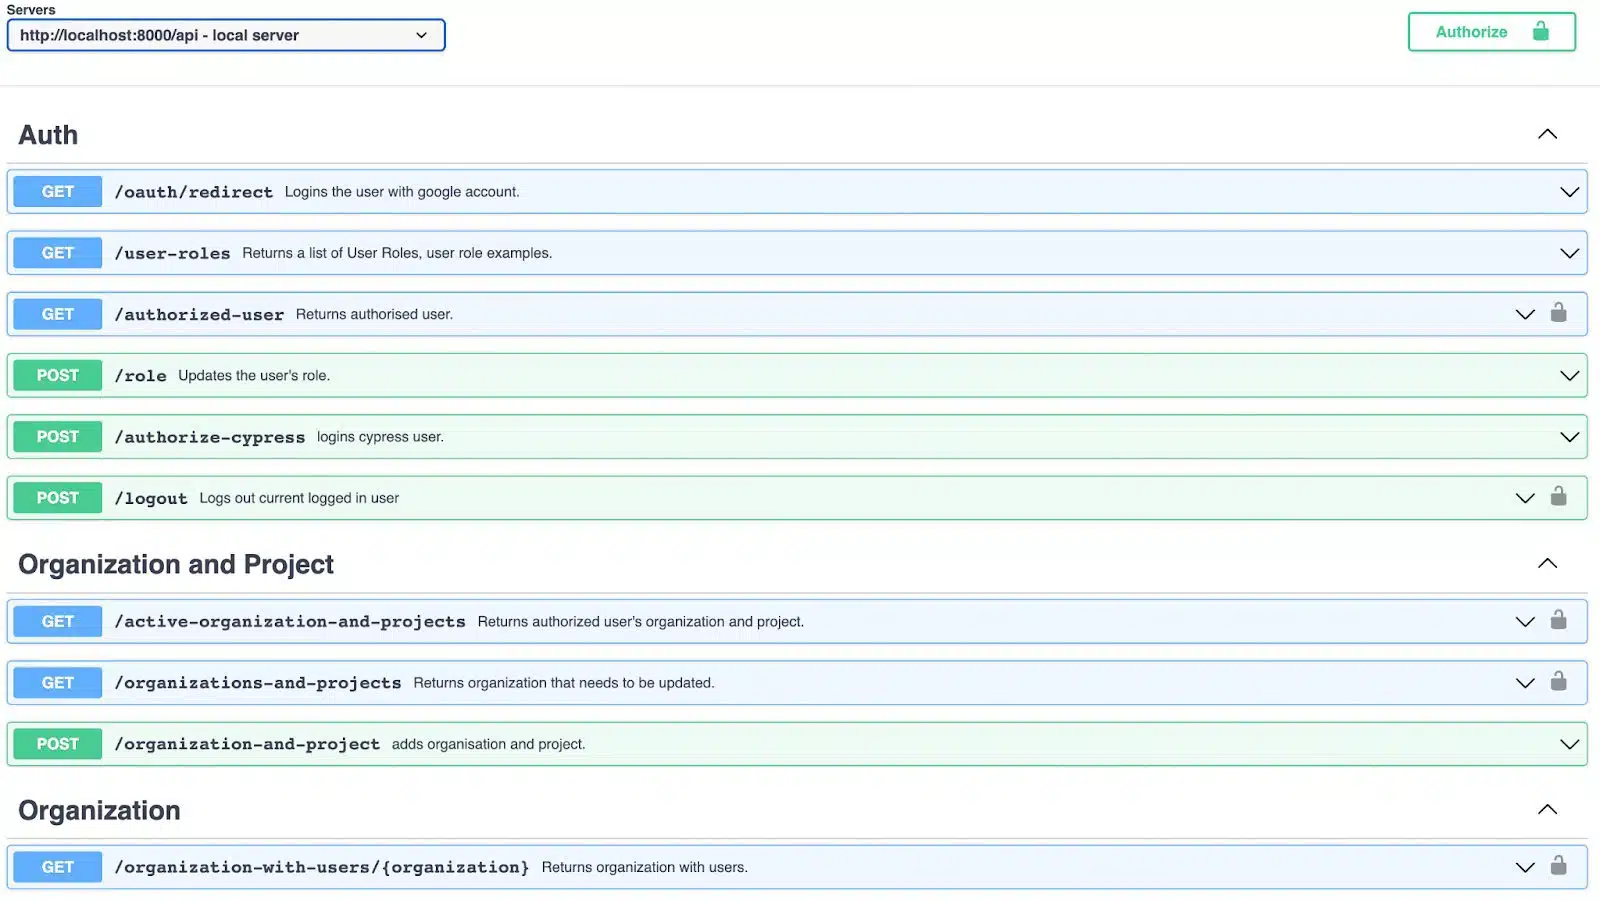
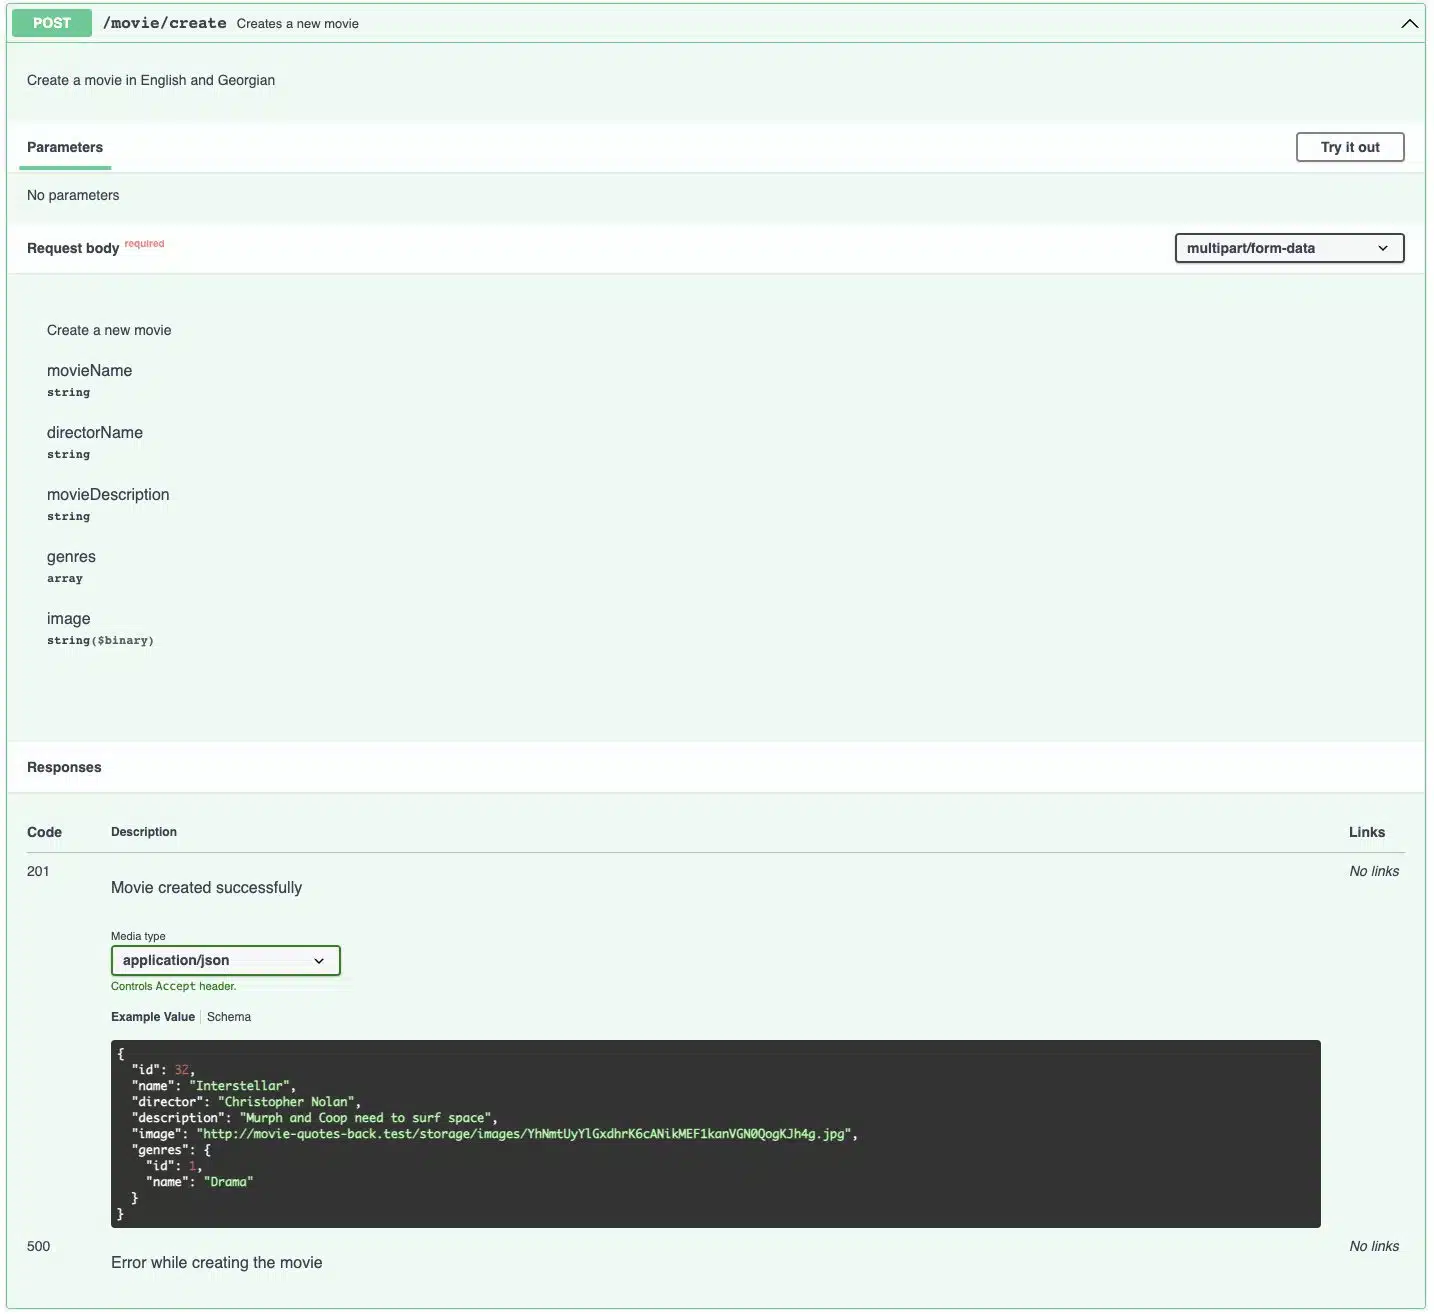
And don’t forget you can send requests and test any endpoint you like:
Finally, if you want to learn more about how to describe your API, you can read Swagger’s Documentation here.
How to Integrate Swagger in a Laravel Project?
Swagger itself provides a Swagger-UI library. It can render the YAML file as a Swagger interface.
So let’s start by installing the Swagger-UI library in our Laravel project with the following command:
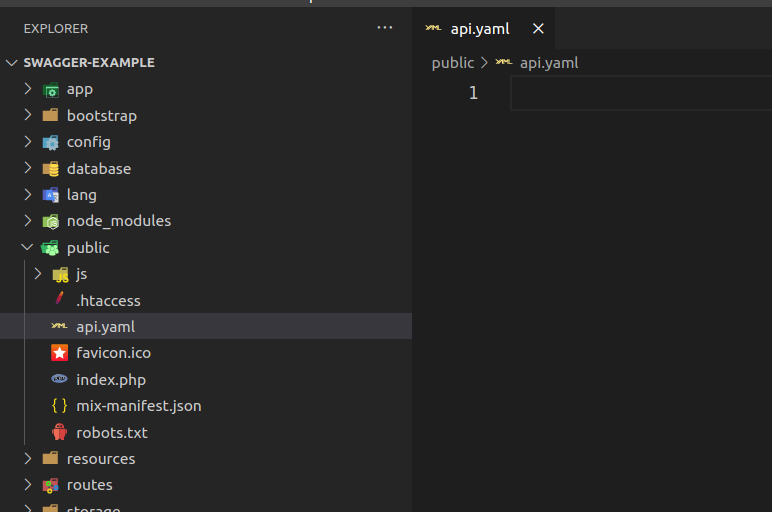
npm install swagger-uiThen you’ll need to create an api.yaml file in your project’s Public directory
After that, insert a little Swagger snippet in api.yaml, which will generate the Swagger interface:
openapi: 3.0.0
info:
  title: Coronatime API
  description: Here goes description
  version: 0.1.9

servers:
  - url: http://localhost:8000/api
    description: local server
  - url: http://producation.app/api
    description: production server

paths:
  /users:
    get:
      summary: Returns a list of users.
      responses:
        '200':
          description: A JSON array of user names
          content:
            application/json:
              schema:
                type: array
                items:
                  type: string
Now let’s create a Javascript file for Swagger in resources/js, which will process api.yaml and generate the Swagger interface:

Let’s put the following Javascript snippet into the Swagger.js file:
import SwaggerUI from 'swagger-ui'
import 'swagger-ui/dist/swagger-ui.css';

SwaggerUI({
    dom_id: '#swagger-api',
    url: '/api.yaml',
});
This snippet will generate the Swagger interface and mount it on the appropriate HTML tag with an ID - swagger-api
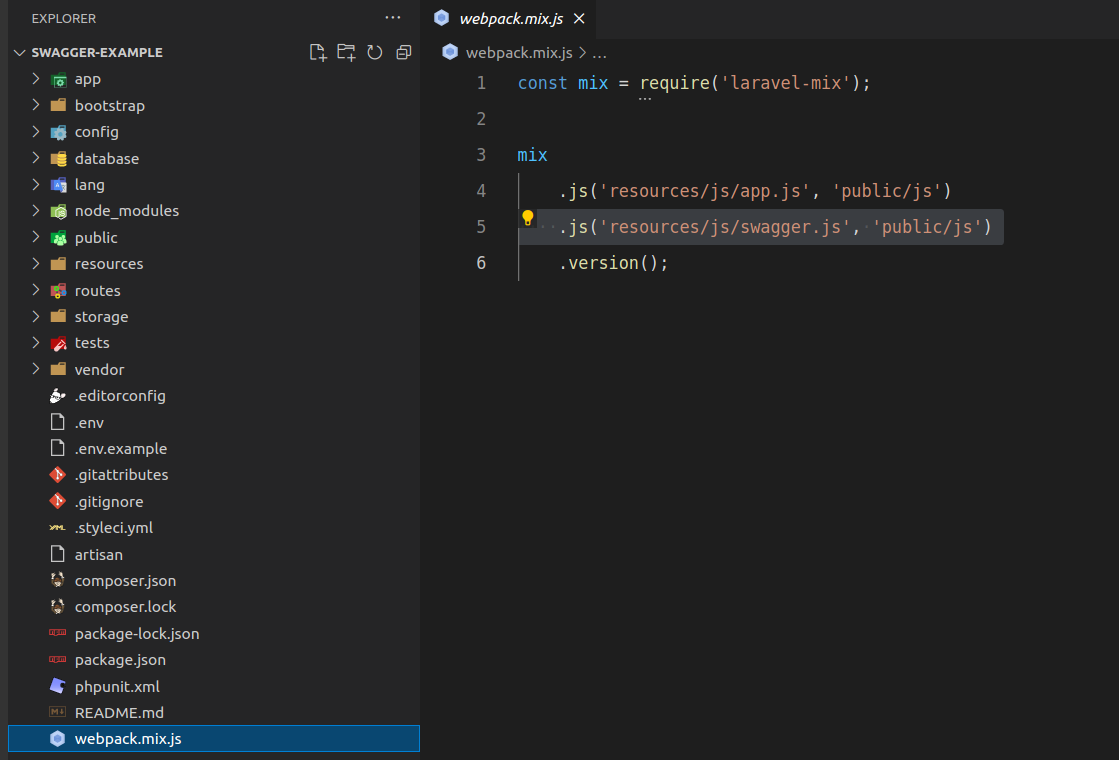
Now in webpack.mix.js, we need to indicate to compile our swagger.js in the public/js directory for the browser to read it as a Javascript file and then for us to use it in our Blade template.
If you use Vite for your Laravel project, you should configure the vite.config.js file:
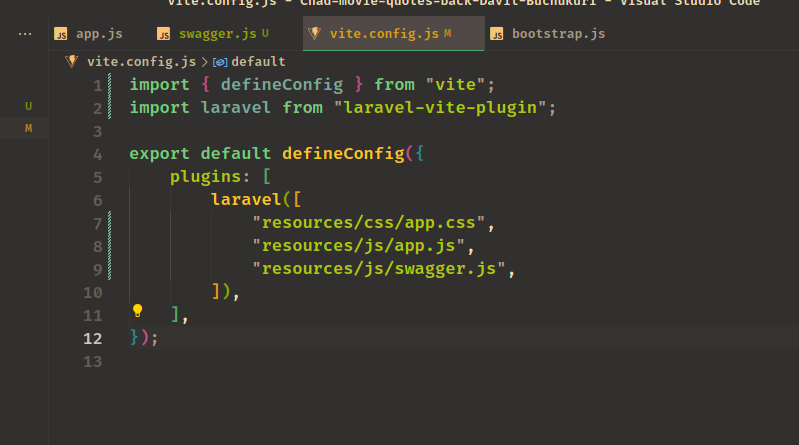
Then run npm run dev, and you will see that you already have the compiled file of swagger.js in public/js. You will also need to run npm run dev if your project uses Vite.
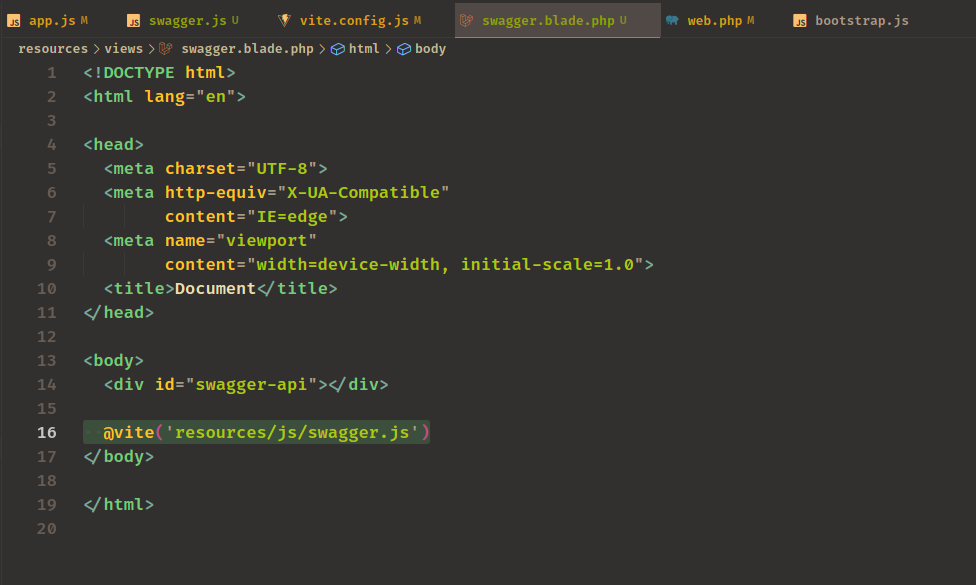
Now let’s create a Blade template for rendering the Swagger interface. That file should have one DIV, the id of which will be swagger-api:
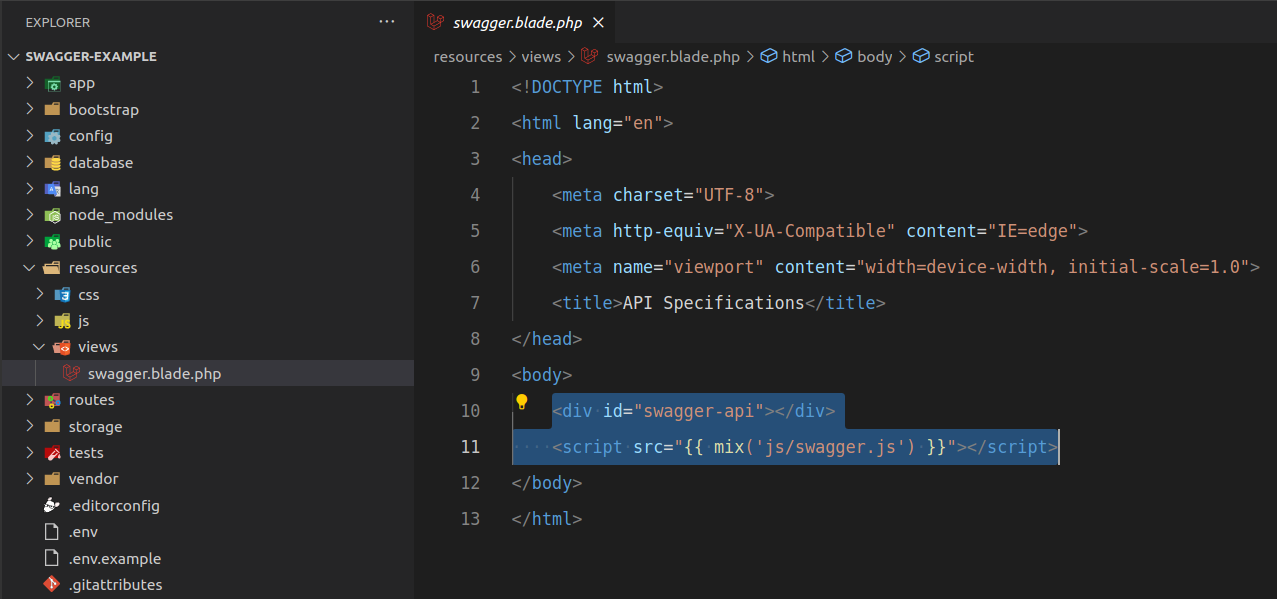
You will also need to include your swagger.js file in that Blade template:
Now let’s create a route that will render our Blade template with the Swagger interface:
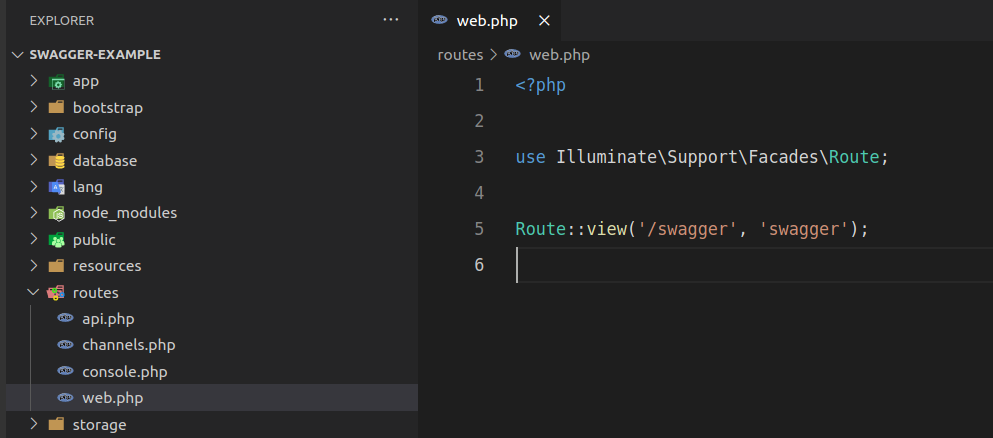
You can now visit your route and… Magic:
Some additional notes and caveats:
⚠ In this case, Swagger’s route is available for everyone. However, in an actual project, it will be necessary to have a middleware applied to the Swagger documentation route so that access to it is authorized.
⚠ Besides, in the actual project, api.yaml should not be accessible to everyone in the public directory.
Written by Giorgi Giunashvili
About the author

Delivery Manager at Redberry
Co-founded Redberry's Laravel Bootcamp
Built E-space, EV Marketplace
Giorgi is a Software Architect and Laravel engineer at Redberry who has delivered production platforms across EV mobility, banking, car rental, and professional-services SaaS. He built E-space, an EV-charger marketplace, the ProCredit Bank website, and Skippit, a multi-tenant ERP for professional-service firms. He also co-founded Redberry's Laravel bootcamp and authors the company's PHP and Laravel developer tutorials.
Last updated on Jul 10, 2026 by


Meet the authors
We are a 200+ people agency and provide product design, software development, and creative growth marketing services to companies ranging from fresh startups to established enterprises. Our work has earned us 100+ international awards, partnerships with Laravel, Vue, Meta, and Google, and the title of Georgia’s agency of the year in 2019 and 2021.


.webp&w=1920&q=75&dpl=dpl_9xQxFYDVmEx871eGvoCPifh1CjuD)