11 min read
How To Use Filament To Create An Admin Panel For Your Laravel Project
Technical Content Writer

Filament is an open-source, modern, feature-rich admin panel developed using the TALL stack. Its main goal is to make the development and management process of web applications more simplified. It provides a user-friendly interface for developers as well as for the administrators to interact with and manage their projects efficiently.
The Filament has the foundations of Livewire components and Laravel, featuring powerful form and table builders that rely heavily on Alpine.js. The UI is designed using Tailwind CSS.
In this guide, we’ll walk you through how to quickly create a Laravel Filament admin panel for your Laravel project and discover all the essential benefits it provides to the php developers.
Laravel Filament: What Are the Benefits?
Filament serves as a valuable tool for developers working on PHP apps. It offers several advantages that make it a compelling choice for building and managing admin panels. Here are some reasons why it’s a good idea to use Filament in our projects:
- Open-source and extensible
Filament is an open-source project, which means that its source code is freely available for developers to view, modify or contribute to. The extensibility of Filament allows for the addition of custom features, providing flexibility for different use cases.
- User-Friendly Interface
Filament provides a clean and intuitive user interface, which makes it easier for developers and administrators to navigate and manage web apps. The well-organized layout ensures that users can efficiently access the features they need.
- Streamlined and rapid development
With Filament being built on top of Laravel, it inherits Laravel’s expressive syntax and developer-friendly features. This can lead to a more streamlined development process, allowing developers to focus on building application-specific features rather than dealing with repetitive administrative tasks.
- Tailwind for styling
Filament uses Tailwind CSS for styling. This allows for rapid and consistent styling without the need for extensive custom CSS, making it easier for developers to maintain a cohesive design.
- Dynamic UI with Livewire and Alpine.js
Filament incorporates Livewire and Alpine.js to enhance the interactivity of the user interface. This allows developers to build dynamic and responsive components without relying heavily on JavaScript frameworks.
- Built for PHP
Filament is specifically designed for PHP applications, aligning well with the language’s ecosystem and conventions.
- Easily Customizable
Filament is designed to be modular, which allows you to add or remove components as per the application’s requirements.
- Community Support
Filament has a growing community of developers who contribute to its improvement and share knowledge. Community support is crucial for addressing issues, finding solutions, and staying updated on best practices when working with Laravel Filament.
Installation Requirements
Before you start installing Laravel Filament, just make sure you have these prerequisites ready:
- PHP 8.1+
- Laravel v10.0+
- Livewire v3.0+
Filament Installation: Step-by-step Guide
To install the Laravel Filament panel builder, we need to run these commands in our Laravel project
composer require filament/filament:"^3.2" -W

php artisan filament:install --panels
After successful installation, try redirecting to /admin/login to open the admin panel’s login page.
Also, you’ll notice a new file created at app/Providers/Filament/AdminPanelProvider.php.
Make sure it is added to the providers array in the config/app.php file. If it’s not there, you might have to add it manually.
Creating User
We can create the new admin user account with the following command:
php artisan make:filament-userThis command will prompt you for the name, email, and password. Once the user is created, you’re good to go.
Accessing The Panel
After deploying to production, it would be recommended to define users who can have access to the admin panel. This can be achieved by implementing the FilamentUser contract on the model class and defining the ‘canAccessPanel’ method within it.
<?php


namespace App\Models;


use Filament\Models\Contracts\FilamentUser;
use Filament\Panel;
use Illuminate\Foundation\Auth\User as Authenticatable;


class User extends Authenticatable implements FilamentUser
{
// ...


public function canAccessPanel(Panel $panel): bool
{
return str_ends_with($this->email, '@yourdomain.com') && $this->hasVerifiedEmail();
}
}
Note: The Filament Panel Builder pre-installs the Form Builder, Table Builder, Notifications, Actions, Infolists, and Widgets packages. No other installation steps are required to use these packages within a panel.
Main Concepts
Panel Builder
Panels are the top-level container in Filament, allowing you to build admin panels that include pages, resources, forms, tables, notifications, actions, widgets and more. All Panels include a default dashboard that can include widgets with statistics, charts, tables and more.
Upon package installation, a default panel is set up for you by the AdminPanelProvider located in the Providers\Filament and residing at the /admin path. All the resources, custom pages, or dashboard widgets you create get registered with this default panel.
However, Filament allows you to create as many panels as needed, each with its unique set of resources, pages and widgets. Modifying each panel is straightforward; you can adjust the panel’s path, related file paths, middlewares, widgets and more.
Creating New Panel
After the Filament v3.0 release, it’s already possible to have and manage multiple panels simultaneously.
We can use the following command to create a new panel:
php artisan make:filament-panel UserIn this example, the command generates a new panel for users, creating a UserPanelProvider.php file that is automatically added to the providers array in the app.php file. Feel free to modify this panel as you see it.
Form Builder
Filament’s form builder allows us to build dynamic forms easily in the application. It is pre-installed with the panel builder and can be used to add a form on any Livewire component. Additionally, it’s also used to render forms within app resources, action models, and table filters.
All Filament forms have a “schema.” This is an array that contains fields and layout components. Fields can be grouped by the Layout components. By the field, we mean the inputs, selected checkboxes and so on. Each field has its own PHP class; for example TextInput class is a representation of a text input field, Select class, on the other hand, is responsible for rendering a select field. When we need to group fields together, we use Layout components, such as Grids, Fieldsets, Tabs, Sections and so on.
In order to add a field to the form, we need to use the make() method and build a schema array with multiple fields.
public function form(Form $form): Form
{
return $form
->schema([
TextInput::make('name'),
TextInput::make('email'),
FileUpload::make('image'),
]);
}
Here, we provide an example of building a form with text input fields for the ‘name’ and ’email’ attributes. Users will input text data into these fields. Additionally, the FileUpload class is used to represent an input field of type file, which is responsible for handling file uploads.
Columns
By default, forms are divided into two columns.
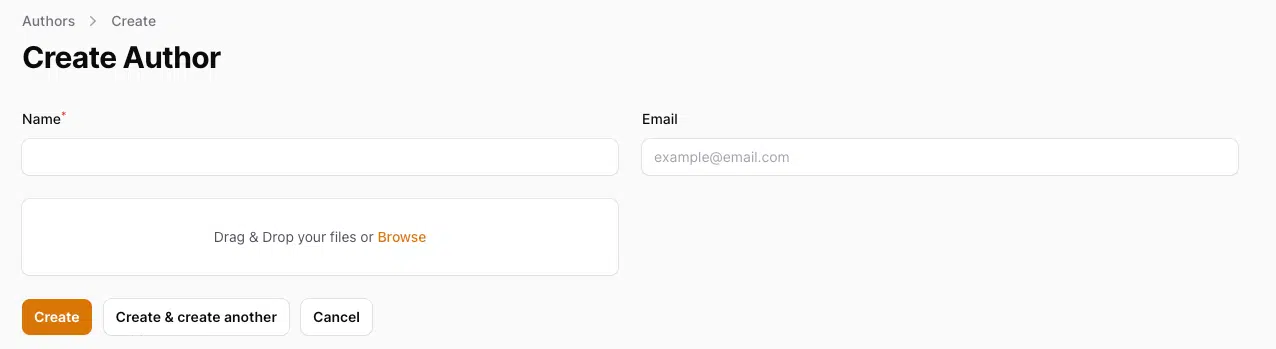
We can divide forms into any number of columns; we just need to define the number of columns we would like to see in the columns() method added to the form schema.
public static function form(Form $form): Form
{
return $form
->schema([
//
])->columns(x);
}
Of course, the UI that we represented above can be improved; the fields can be organized in different sections or groups to provide a better UI.
For example, we can achieve this:
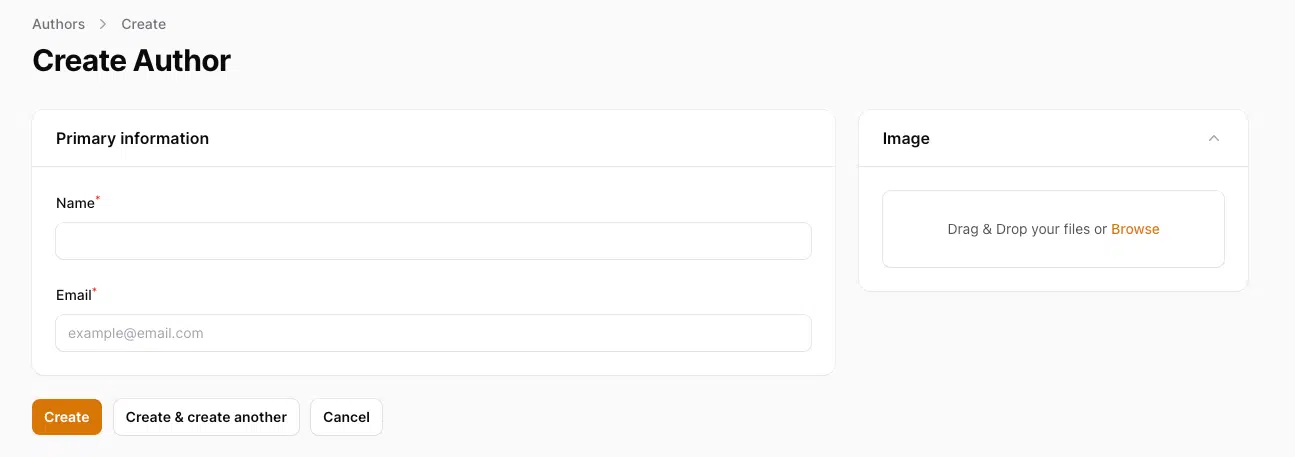
By doing this
public static function form(Form $form): Form
{
return $form
->schema([
Forms\Components\Section::make('Primary information')
->schema([
Forms\Components\TextInput::make('name')
->required()
->maxLength(255),
Forms\Components\TextInput::make('email')
->required()
->email()
->placeholder('example@email.com'),
])->columnSpan(2),
Forms\Components\Section::make('Image')
->schema([
Forms\Components\FileUpload::make('image')
->hiddenLabel()
->disk('public')
])
->columnSpan(1)
->collapsible()
])->columns(3);
}
The form is organized into three columns and two sections. The first section spans two columns for a longer layout. We also have the columnSpanFull() method available if we want the column to take the full width. label(), placeholder(), hiddenLabel(), disk(), and collapsible() customize fields. For validation: required(), email(), maxLength() methods are used. We have so many validation methods defined in the Filament, but in case there is something that has no method provided, we can add anything we can do in Laravel with the help of the rules() method.
Table Builder
This package is used to build and customize tables, create and manage filters, sort, pagination, and so on. It allows us to add data tables to any Livewire component.
Defining table columns
Columns are stored in an array as objects within the $table->columns() method.
Let’s take a look at the example: Imagine we have a bookstore management panel where we display a table featuring images of books, their names, and an indicator of whether they are bestsellers or not.
public static function table(Table $table): Table
{
return $table
->columns([
Tables\Columns\ImageColumn::make('thumbnail')
->label('Image'),
Tables\Columns\TextColumn::make('name')
->sortable()
->searchable(),
Tables\Columns\IconColumn::make('is_best_seller')
->label('Best Seller')
->boolean(),
]);
}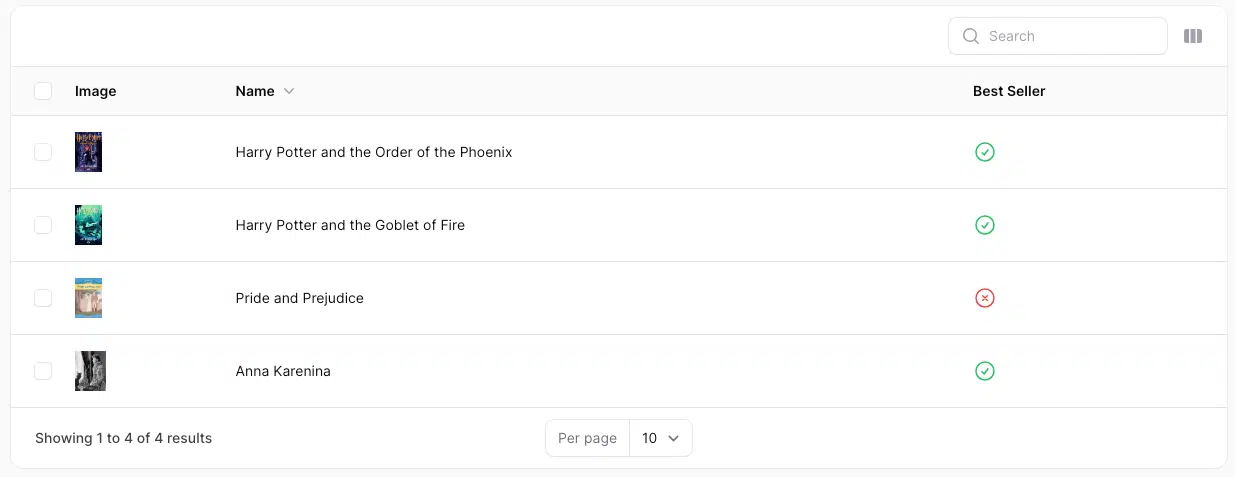
In this example, there are three columns in the table. The first one displays the image, the second displays the text (which is the name of the book and is also sortable and searchable), and the third column displays an icon — either a green check or a red cross — depending on whether the book is a bestseller or not.
You can also display data in a column that belongs to a relationship. For example, if the book has a publisher and we need to also display the publisher’s name in the table, we can add the column defined like this:
Tables\Columns\TextColumn::make('publisher.name')->sortable()Please keep in mind that the relationship with the name of the publisher should be defined in the Book model class.
In addition, columns() is not the only method that can be defined in the table, there, we can also define the pagination methods, empty state heading method, filters, actions, bulk actions and so on. Filters, as well as the actions, are flexible and customizable. We can add select filters, checkboxes, ternary filters, custom filters and so on.
public static function table(Table $table): Table
{
return $table
->columns([])
->filters([
Tables\Filters\TrashedFilter::make(),
Tables\Filters\SelectFilter::make('genre_id')
->label('Genres')
->relationship('genre', 'name')
->searchable()
->multiple()
->preload(),
Tables\Filters\TernaryFilter::make('is_best_seller')
]);
}
For example, here we have defined the TrashedFilter, which adds a select for the soft deleted records filter, the SelectFilter, which adds a select with options for book genres filled from the related table, and the TernaryFilter for a boolean column indicating whether or not we need to filter by bestseller or not.
Additionally, Filament extends its functionality through various open-source plugins that can enhance your development experience. You can also check out these plugins and see a diverse range of features.
Final Thoughts
To sum up, Laravel Filament addresses the need for a user-friendly and extensible admin panel for PHP applications. It simplifies the development process, enhances the user interface with dynamic features, and is based on popular technologies like Laravel, Tailwind CSS, Alpine.js, and Livewire. So, if you’re building a new PHP application or looking to improve the admin experience of an existing project, this tool will definitely provide a solid foundation for efficient development and management.
About the author

Technical Content Writer at Redberry
Translates Engineering Work into Client-Facing Content
Keti leads editorial content at Redberry, writing and producing the company's technical articles, case studies and client interview series. Her work helps translate our team's first-hand engineering experience into helpful content for a global audience.
Last updated on Jul 10, 2026 by


Meet the authors
We are a 200+ people agency and provide product design, software development, and creative growth marketing services to companies ranging from fresh startups to established enterprises. Our work has earned us 100+ international awards, partnerships with Laravel, Vue, Meta, and Google, and the title of Georgia’s agency of the year in 2019 and 2021.


.webp&w=1920&q=75&dpl=dpl_9xQxFYDVmEx871eGvoCPifh1CjuD)